 Save
Save Barely a sound fills the kitchen except for the gentle clatter of knives against the wooden cutting board as I slice overripe bananas, their sweet aroma hinting at the dessert to come. On warm evenings, I often crave something cool yet unfussy, and this peanut butter banana ice cream sprang from my desire for childhood comfort—without a churn or trip to the store. My first attempt involved a little guesswork and more than a few sticky fingers, but the creamy, nutty result was instantly addictive. Gazing from the window as the sun dipped low, I realized just how much joy could come from four simple ingredients. Even the clatter of the food processor managed to sound wonderfully anticipatory in the hush of the evening air.
Last spring, I whipped up a batch during an impromptu movie night with friends, and everyone paused mid-scene to marvel as the food processor whirred. The laughter that followed when we compared ice cream mustaches was nearly as sweet as the dessert itself. Sharing these bowls created a little festival right in my living room, all thanks to a handful of ingredients hiding in my kitchen.
Ingredients
- Ripe bananas: The more spots the better—ripe bananas bring natural sweetness and help yield that impossibly creamy texture, so let them sit on the counter until freckled.
- Creamy peanut butter: The key to a lush, nutty depth; smooth varieties blend best, but I've discovered a swirl of crunch can be welcome, too.
- Maple syrup: Just a drizzle coaxes out the caramel notes and balances the fruit—taste as you go, since very ripe bananas might mean you need a bit less.
- Vanilla extract: A dash takes everything up a notch, rounding out the ice cream's flavors and adding that irresistible, old-fashioned dessert scent.
Tired of Takeout? 🥡
Get 10 meals you can make faster than delivery arrives. Seriously.
One email. No spam. Unsubscribe anytime.
Instructions
- Prep and Freeze Bananas:
- Spread out your banana slices on a parchment-lined baking sheet, and freeze until they’re solid—this usually takes about two hours, when you can easily snap a piece between your fingers.
- Combine the Ingredients:
- Once the bananas are frozen, add them to your food processor along with the peanut butter, maple syrup, and vanilla; you’ll hear the pieces bounce around before they start to blend.
- Blend until Silky-Smooth:
- Pulse and scrape down the sides as necessary—the mixture transforms from chunky to perfectly creamy, and you’ll know it’s ready when the blades glide easily and the scent is pure peanut butter bliss.
- Scoop or Freeze Again:
- If you’re after soft-serve, scoop it out now; for classic scoopable ice cream, transfer to a loaf pan, smooth the top, and freeze for another hour or two to firm up.
- Serve and Enjoy:
- Once set, grab your favorite spoon (or ice cream scoop), dish it up, and dig in before it melts—moments like this tend not to last long.
 Save
Save One late afternoon, a thunderstorm knocked out the power, and with nothing left to do but wait in candlelight, I remembered a batch of this ice cream in the freezer. Sharing melting scoops while rain drummed on the windows turned an otherwise mundane power outage into something quietly magical, a reminder that desserts can transform an ordinary moment.
Customizing Your Ice Cream Experience
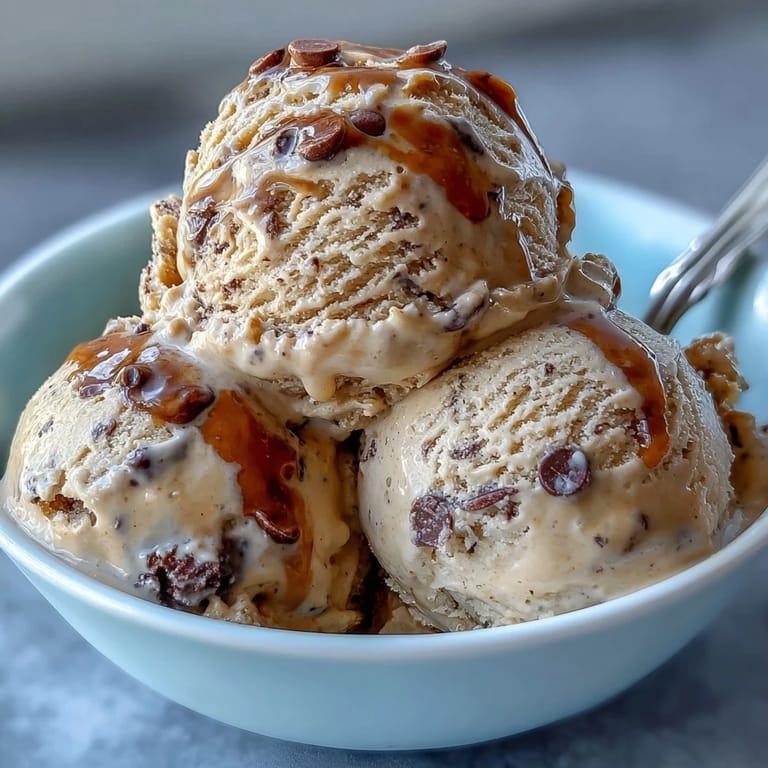
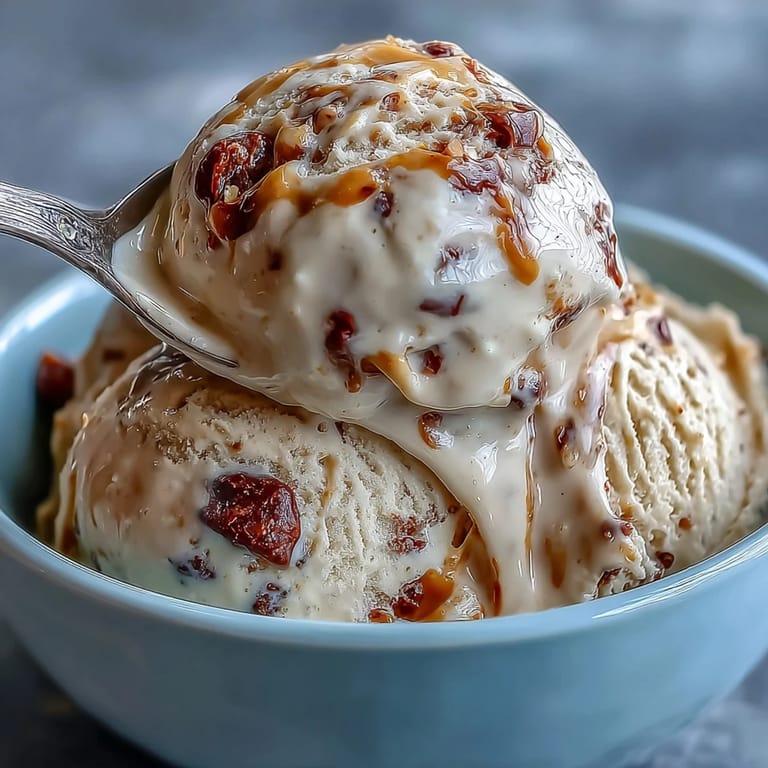
After a few rounds, I started stirring in chocolate chips and roasted peanuts for a little crunch—sometimes even a spoonful of cocoa powder finds its way into the mix when I want a chocolatey twist. One friend swears by adding cinnamon, and for parties, I'll offer a trio of toppings like sliced strawberries or coconut flakes to let everyone play ice cream parlor at home.
No-Fuss Freezing and Serving Tricks
It took a surprising number of attempts to realize that using a metal loaf pan for the final freeze makes scooping much easier than glass. Also, pressing a piece of parchment paper right on the surface keeps ice crystals away and leaves the top irresistibly smooth. There’s even a little thrill in peeling off the parchment before serving, like uncovering hidden treasure.
Making It With Kids (Or Your Inner Child)
Little hands are perfect for peeling bananas and sneaking licks of peanut butter off spoons, and the anticipation as they peek into the freezer is half the fun. Even if you’re flying solo, swirling together flavors and taste-testing along the way is pure, happy playtime.
- Try freezing bite-sized dollops on a tray for instant mini treats.
- If nuts are an issue, sunflower seed butter works wonders.
- Don’t stress over perfect scoops—melty edges are part of the charm.
 Save
Save Whether you share it or keep every scoop for yourself, this ice cream brings that easy happiness only simple, homemade treats can offer. Here’s to more sweet moments, no matter the season.
Recipe FAQs
- → How long should bananas be frozen before blending?
Freeze peeled, sliced bananas for at least 2 hours until fully solid; longer freezing helps achieve a smoother, firmer texture when processed.
- → What appliance works best to get a creamy texture?
A food processor or high‑powered blender yields the creamiest results. Pause to scrape down the sides and pulse until smooth to avoid overheating the blades.
- → Can I substitute peanut butter with another nut butter?
Yes. Almond or cashew butter are excellent swaps and change the flavor profile while keeping the same creamy mouthfeel.
- → How can I make the mixture scoopable rather than soft‑serve?
After blending until smooth, transfer to a loaf pan, smooth the top and freeze for 1–2 hours to firm up. Let sit a few minutes at room temperature before scooping for easier serving.
- → What mix‑ins or toppings work well?
Fold in chocolate chips, chopped nuts, or swirl melted chocolate before the final freeze. Fresh berries or a drizzle of nut butter make bright finishing touches.
- → How long does the frozen dessert keep in the freezer?
Stored in an airtight, freezer‑safe container, it keeps well for up to two weeks. Thaw slightly before scooping for best texture.