 Save
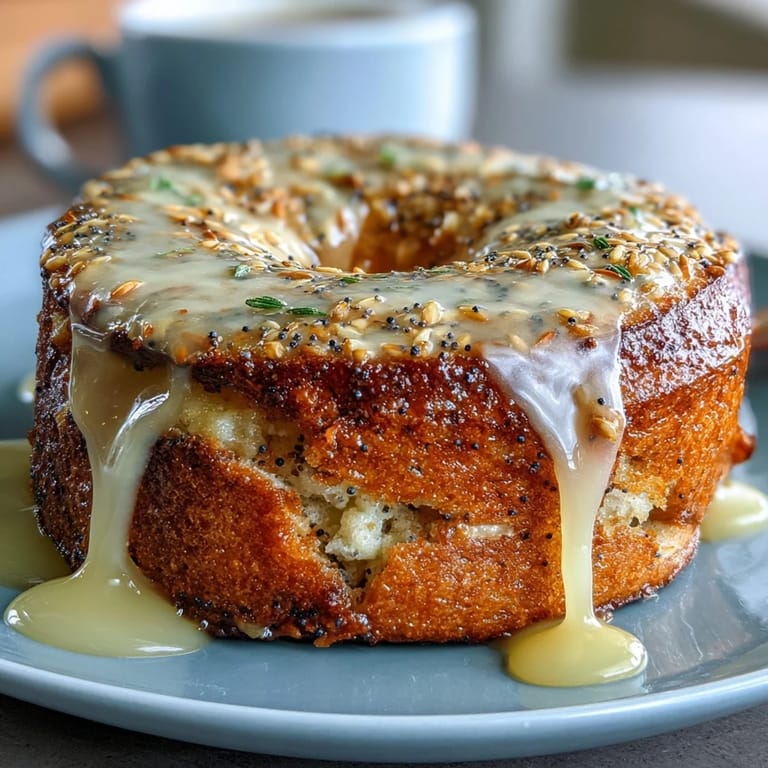
Save The first time I made bagels at home, I was standing in my kitchen at dawn, wondering if I could actually pull off something that seemed so bakery-exclusive. These lemon poppy seed ones came about because I'd been craving that bright, citrusy punch you get from a good breakfast bagel, but I wanted them packed with protein so they'd actually keep me full. What started as an experiment with Greek yogurt and some protein powder turned into something I now make on lazy Sunday mornings, filling my whole kitchen with this incredible lemon-vanilla aroma that makes everyone else want to wake up.
I remember making these for my sister when she was visiting, and she was skeptical until she took that first bite still warm from the rack. The way her expression changed from polite interest to genuine delight made me realize this recipe was special. Now whenever she comes over, these are her first request, and we've turned it into this little ritual of toasting them together while we catch up.
Ingredients
- Bread flour (2 cups): Use bread flour specifically, not all-purpose, because it gives you that chewy bagel texture you're after.
- Vanilla or unflavored whey protein powder (1 cup): This is what makes them protein-packed without tasting like a gym smoothie, but make sure you choose a quality powder you actually enjoy.
- Poppy seeds (2 tbsp): Toast them lightly in a dry pan before adding if you want an even deeper, nuttier flavor.
- Baking powder (1 tbsp): This helps them rise without needing yeast, which simplifies everything.
- Fine sea salt (1/2 tsp): Don't skip this or increase it, because salt actually brightens the lemon flavor.
- Granulated sugar (1/4 cup): Balances the tartness of the lemon without making them sweet.
- Lemon zest (from 2 lemons): This is crucial, so use a microplane and get that bright yellow part only, not the bitter white pith.
- Plain Greek yogurt (1 cup): This creates the tender crumb and adds tanginess that pairs perfectly with lemon.
- Egg (1 large): Binds everything together and contributes to that golden exterior.
- Fresh lemon juice (1 tbsp): Adds brightness to the dough itself.
- Unsalted butter, melted (2 tbsp): Enriches the dough and adds tenderness.
- Water for boiling (2 quarts): Use filtered water if your tap water is heavily chlorinated, as it can affect flavor.
- Honey (1 tbsp): Sweetens the boiling liquid and helps them brown beautifully.
- Egg wash (1 beaten egg plus 1 tbsp water): Creates that glossy, professional-looking finish.
- Powdered sugar (3/4 cup): For the glaze, sift it first if it's lumpy.
- Fresh lemon juice for glaze (2 tbsp): Make it with juice you've just squeezed, not bottled, for real brightness.
- Lemon zest for glaze (1 tsp): A final touch that makes the glaze look and taste intentional.
Tired of Takeout? 🥡
Get 10 meals you can make faster than delivery arrives. Seriously.
One email. No spam. Unsubscribe anytime.
Instructions
- Set up your workspace:
- Preheat your oven to 375°F and line a baking sheet with parchment paper, because this prevents sticking and makes cleanup actually pleasant. Get your bowls and utensils ready so you're not scrambling mid-mix.
- Combine your dry team:
- In a large bowl, whisk together the bread flour, protein powder, poppy seeds, baking powder, salt, sugar, and lemon zest until everything is evenly distributed and you can smell that lovely citrus throughout. This takes about a minute and makes sure the protein powder doesn't clump later.
- Mix your wet ingredients:
- In another bowl, stir the Greek yogurt, egg, lemon juice, and melted butter together until it's smooth and well combined. Don't overthink it, just get everything incorporated.
- Bring wet and dry together:
- Add the wet mixture to the dry ingredients and stir with a wooden spoon until it starts coming together, then use your hands to knead the dough for about 2 to 4 minutes until it's soft and only slightly tacky. It should feel almost like a tender pizza dough, not sticky enough to stick to your hands constantly.
- Adjust as you go:
- If it's too dry and crumbly, add a tablespoon of yogurt at a time; if it's too sticky, dust in a bit more flour. This is where you learn the dough's personality.
- Shape your bagels:
- Divide the dough into 8 equal pieces, roll each into a ball, then poke your thumb through the center and gently stretch it into a bagel shape with a hole in the middle that's about the size of a quarter. Don't worry if they're not perfect circles, they taste the same.
- Let them rest:
- Place the shaped bagels on your prepared baking sheet, cover loosely with a clean towel, and let them sit for 15 minutes while you prepare the boiling water. This brief rest makes them tender.
- Prepare your boiling bath:
- Bring 2 quarts of water and 1 tablespoon of honey to a gentle boil in a large pot, then reduce the heat to a simmer. The honey sweetens the exterior slightly and helps them brown.
- Boil in batches:
- Working in batches so they have space, gently place bagels into the simmering water and boil for 30 seconds on each side, using a slotted spoon to flip and remove them. They should look slightly puffed and feel firmer, and you'll hear them make a soft sizzle sound as they go in.
- Return and finish:
- Place the boiled bagels back on the baking sheet, brush each one with egg wash until they're glossy and golden-looking, and then slide them into the oven for 18 to 22 minutes until they're deeply golden and sound hollow when you tap them. The kitchen will smell absolutely incredible at this point.
- Cool completely:
- Transfer the baked bagels to a wire rack and let them cool for at least 10 minutes before glazing, because the glaze will pool and set better on a slightly cooled surface.
- Make and apply your glaze:
- While they're cooling, whisk together the powdered sugar, fresh lemon juice, and lemon zest in a small bowl until you have a pourable but still thick glaze. Drizzle it over each cooled bagel with a fork or small spoon, letting it cascade down the sides.
- Let it set:
- Give the glaze a few minutes to firm up before serving or storing, so it stays in place and doesn't smudge everything.
 Save
Save There was this morning when my neighbor stopped by just as I was pulling a batch out of the oven, and I handed her one still warm with the glaze still setting. She bit into it right there on my porch and literally closed her eyes, which sounds dramatic but that's exactly what happened. That moment taught me that food made with care and good ingredients really does taste different, and it's worth the extra few steps.
Storage and Keeping Them Fresh
These bagels keep for about three days in an airtight container at room temperature, which is honestly longer than they usually last in my house. I store them in a ziplock bag with parchment between each one so they don't stick together, and if you want to reheat them, just pop them in the toaster like you normally would. The texture holds up beautifully even on day three, which is a testament to how well-made these are.
Flavor Variations That Actually Work
Once you nail this basic recipe, you can play around in ways that feel natural. I've added a teaspoon of lemon extract to the dough for an even more intense flavor, and it's honestly incredible if you like bold lemon. Some mornings I switch the poppy seeds for sesame seeds, and it becomes this completely different bagel that's still delicious. The protein powder base is stable enough that you can experiment without things falling apart.
Making Them Work for Your Life
These bagels are perfect for meal prep because you can toast them in the morning, spread them with cream cheese or almond butter, and have an actual breakfast that keeps you satisfied through your whole morning. I've also frozen them individually wrapped in plastic wrap, and they thaw beautifully, tasting almost as good as fresh. They're equally good still warm with butter melting into them, or toasted with a simple smear of ricotta and a drizzle of honey.
- Pro tip: Slice them in half before freezing so you can toast them straight from frozen without thawing.
- Remember: If anyone in your house has a gluten allergy, you can experiment with gluten-free bread flour blends, though the texture will be slightly different.
- Final thought: Make an extra batch and keep some in the freezer because homemade bagels at breakfast suddenly becomes your favorite reason to wake up early.
 Save
Save These bagels became my answer to that 3 p.m. slump when I need something that tastes indulgent but actually nourishes me. Once you make your first batch, you'll understand why making bagels at home feels like learning a little kitchen magic.
Recipe FAQs
- → What gives these bagels their lemon flavor?
Lemon zest and fresh lemon juice are incorporated into the dough and glaze, providing a bright, citrusy aroma and taste.
- → How does the protein powder affect the texture?
Vanilla whey protein powder adds moisture and subtle flavor while contributing to a tender and slightly dense crumb.
- → Why are the bagels boiled before baking?
Boiling briefly in honey-sweetened water helps create a chewy crust and improves oven spring for that classic bagel texture.
- → Can I substitute Greek yogurt with a non-dairy alternative?
Yes, using dairy-free yogurt works well to maintain moisture and texture for a non-dairy version.
- → How should I store these bagels to keep them fresh?
Store in an airtight container at room temperature for up to three days or freeze for longer storage.