 Save
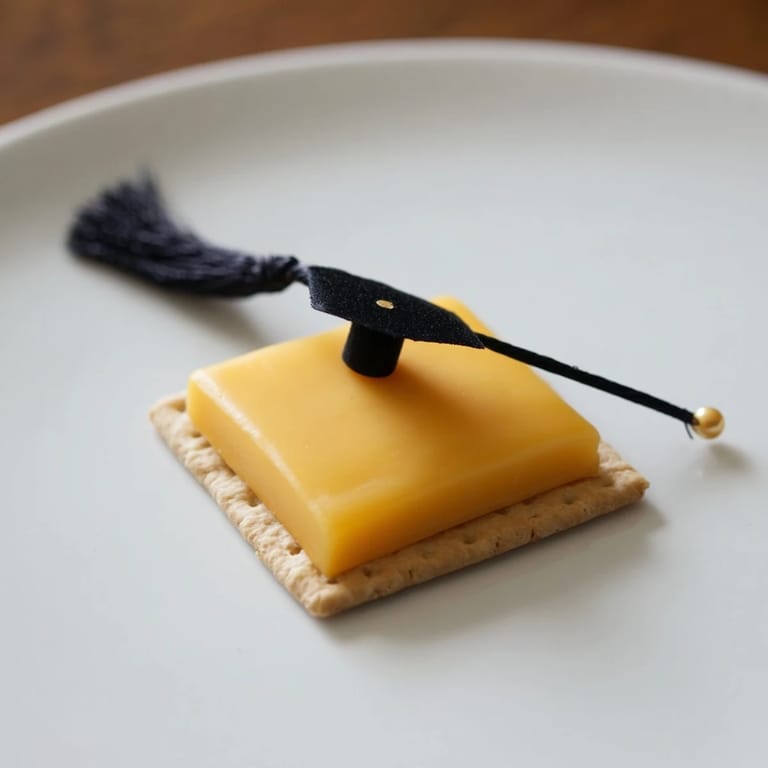
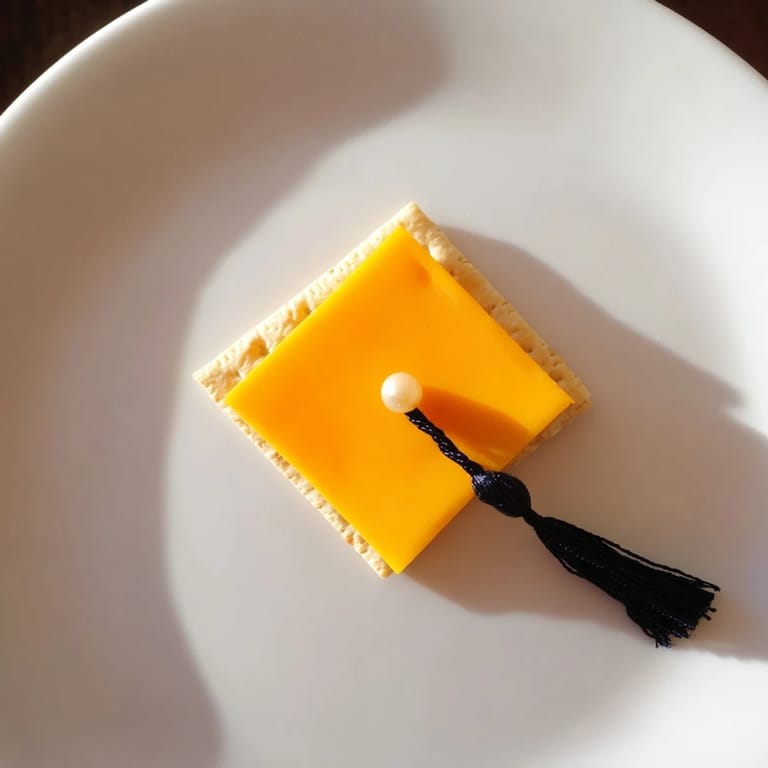
Save I still remember the afternoon I created these little graduation caps for my cousin's celebration party. She was graduating high school, and I wanted to make something that captured the joy of the moment without requiring me to spend hours in the kitchen. As I arranged those first cheese squares on crackers, watching the licorice tassels drape just right, I realized I'd stumbled onto something magical—a snack that made people smile the moment they saw it, before they even took a bite.
The real magic happened when my cousin walked into the kitchen and saw them lined up on the platter. Her face lit up in a way that had nothing to do with hunger and everything to do with feeling celebrated. That's when I understood—this snack isn't just about the flavors, it's about the moment you create when you put thought and creativity onto a plate.
Ingredients
- Square crackers (Wheat Thins, water crackers, or similar): These form your graduation cap's foundation. They need to be sturdy enough to hold the cheese without getting soggy, and the square shape is essential for that authentic cap look. I've learned that slightly thicker crackers hold up better if you're assembling these more than an hour ahead.
- Square cheese slices: Cheddar brings a bold flavor, Swiss adds nuttiness, and American cheese is the most forgiving for adhesion. Cut them to roughly 1.5 inches square—precision here matters because it's what creates that clean, academic look. Room temperature cheese adheres better than cold cheese.
- Licorice strings or dried fruit strips: Black licorice is traditional and visually striking, but mango or apricot strips create a softer, more approachable look. Cut them to about three inches so the tassel has enough length to drape elegantly. Fruit leather is wonderful because it's naturally sweet and photographs beautifully.
- Cream cheese or hummus for adhesive: This is your edible glue, and it's important. A small dab—about the size of a pea—is all you need at each connection point. Both work equally well, but hummus adds a savory note if you're going that direction.
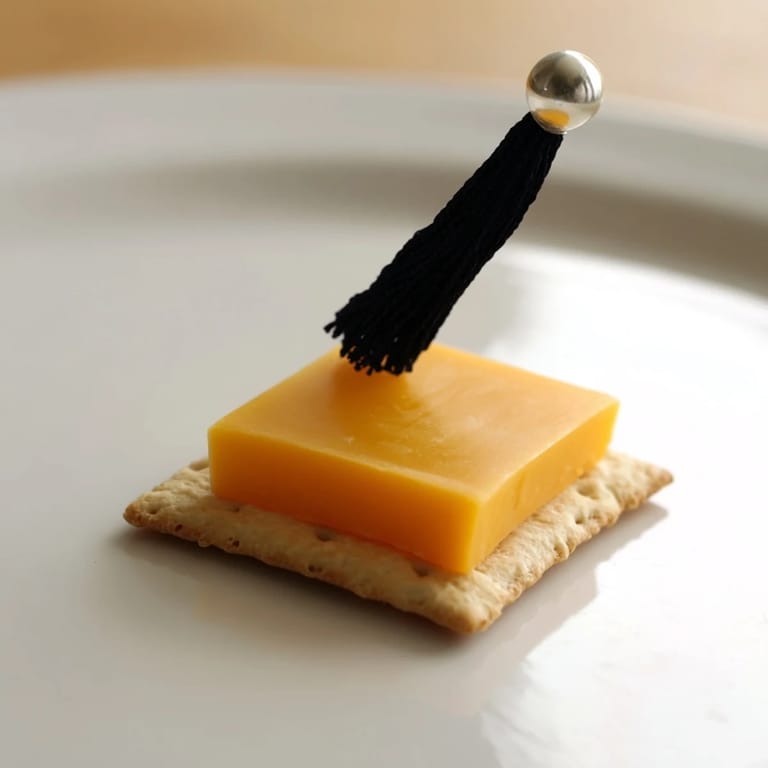
- Candy pearls or raisins for the button: These are optional but they're the detail that transforms these from cute to adorable. They represent the tassel button on a real graduation cap, adding that authentic touch.
Tired of Takeout? 🥡
Get 10 meals you can make faster than delivery arrives. Seriously.
One email. No spam. Unsubscribe anytime.
Instructions
- Gather and prep your workspace:
- Lay out your crackers on a clean cutting board or serving platter. If you're making these more than thirty minutes ahead, keep them at room temperature away from moisture. Have your cheese slices ready, and if they're very cold, let them sit for a few minutes so they're more pliable.
- Build the cap:
- Take one cracker and top it with a cheese slice, aligning all four corners as precisely as you can. This is where the magic of the look happens—that perfect square sitting on a square creates the illusion of a real graduation cap when seen from above.
- Attach the tassel:
- Take one corner of your licorice string or fruit strip and place a tiny dab of cream cheese or hummus on one corner of the cheese square. Press the end of your tassel gently into that spot. The adhesive should hold immediately, but if it feels loose, add just a hair more.
- Let it drape naturally:
- Position the tassel so it hangs over the edge of the platter, creating that signature graduation cap silhouette. Don't force it—let gravity do the work. A gently curved drape looks more elegant than a tight hang.
- Add the button (optional but recommended):
- If you're using a candy pearl or raisin, place it at the base of the tassel on top of the cheese. Secure it with the tiniest dab of cream cheese or hummus. This detail makes the difference between a cute snack and a conversation piece.
- Repeat with confidence:
- You're in a rhythm now. Each one should take about thirty to forty seconds. Don't worry if they're not perfectly identical—slight variations make them feel handmade and genuine.
- Serve immediately or chill briefly:
- These are best enjoyed within a couple of hours of assembly. If you need to make them ahead, cover them loosely with plastic wrap and refrigerate for up to four hours. Remove them fifteen minutes before serving so the cheese isn't too stiff.
 Save
Save There was a moment during my cousin's party when I watched her best friend pick up one of these snacks, study it carefully, take a photo, and then smile so genuinely before eating it. That's when I realized this recipe does something special—it transforms a snack into a memory, a moment of delight in an already joyful day. Food doesn't always have to be complicated to feel meaningful.
Customizing Your Caps
One of my favorite discoveries is how adaptable these are to whatever you have available. I've made them with everything from sharp aged cheddar to mild gouda, and each cheese tells its own story. Different colored fruit leathers create entirely different moods—I once made a batch with purple mango strips for a concert celebration, and they looked like they belonged at an art gallery. The beauty here is that your personal pantry becomes the recipe. Use water crackers for elegance, whole grain for earthiness, or even sturdy vegetable chips if you want to get creative. The only rule is that your base needs to be square and sturdy enough to hold everything together.
Making Them Ahead
I've learned through practice that timing matters less than temperature with these. If you're hosting a larger gathering and want to reduce last-minute stress, you can assemble these up to four hours ahead. The key is keeping them loosely covered in the refrigerator—I use a large sheet of parchment paper draped over the platter rather than a tight plastic wrap, which keeps them fresh while allowing them to breathe. Take them out about fifteen minutes before your guests arrive so the cheese reaches a comfortable temperature and the overall presentation feels freshly made rather than stored.
Dietary Variations
I've successfully made these for friends with various dietary needs, and it's actually simpler than you'd think. For a gluten-free celebration, any quality gluten-free cracker works perfectly—the taste difference is minimal, and nobody would know unless you told them. For vegan guests, use a good quality dairy-free cheese slice and vegan cream cheese or hummus as your adhesive. The licorice or fruit tassel remains unchanged. I've even made a completely nut-free version for friends with allergies by swapping traditional licorice for fruit leather strips, which are naturally free from common allergens. The structure remains exactly the same; you're just changing the players.
- Always check ingredient labels carefully if serving to guests with allergies—even seemingly simple crackers can contain hidden allergens.
- Dairy-free cheese works best if you let it come to room temperature first, just like regular cheese.
- Fruit leather is naturally sweet and often comes with fewer allergens than licorice, making it an excellent inclusive choice.
 Save
Save Every time I make these now, I'm transported back to that graduation party, that moment of pure joy on my cousin's face. It reminds me that the best recipes aren't always about technical skill—they're about showing people they matter through thoughtful, joyful food.
Recipe FAQs
- → What types of crackers work best for this snack?
Square crackers like Wheat Thins or water crackers provide a sturdy base and clean edges to mimic a cap shape perfectly.
- → Can I use different cheeses for these snacks?
Yes, cheddar, Swiss, or American cheese slices work well; feel free to try other firm cheeses for variety.
- → What alternatives can I use for the tassel?
Black licorice or thin dried fruit strips such as mango or apricot cut into narrow pieces create a colorful, edible tassel.
- → How do I attach the tassel to the cheese slice?
Use small dots of cream cheese or hummus as an adhesive to secure one end of the tassel to a corner of the cheese slice.
- → Are there allergen considerations for this snack?
Yes, this includes milk from cheese, wheat in crackers, and possible soy in licorice. Always verify ingredients for your guests’ needs.